To get frame joining right, you need to cut corners precisely at 45 degrees for tight, seamless joints using proper mitering tools. Secure the corners with clamps or corner keys to maintain alignment during assembly. Always use the correct hardware, like glazing points and clips, to hold glass and components firmly in place. Follow a proper sequence—frame, mat, artwork, glass—to guarantee everything fits perfectly and stays secure. Mastering these techniques will elevate your framing skills; there’s more to discover if you keep exploring.
Key Takeaways
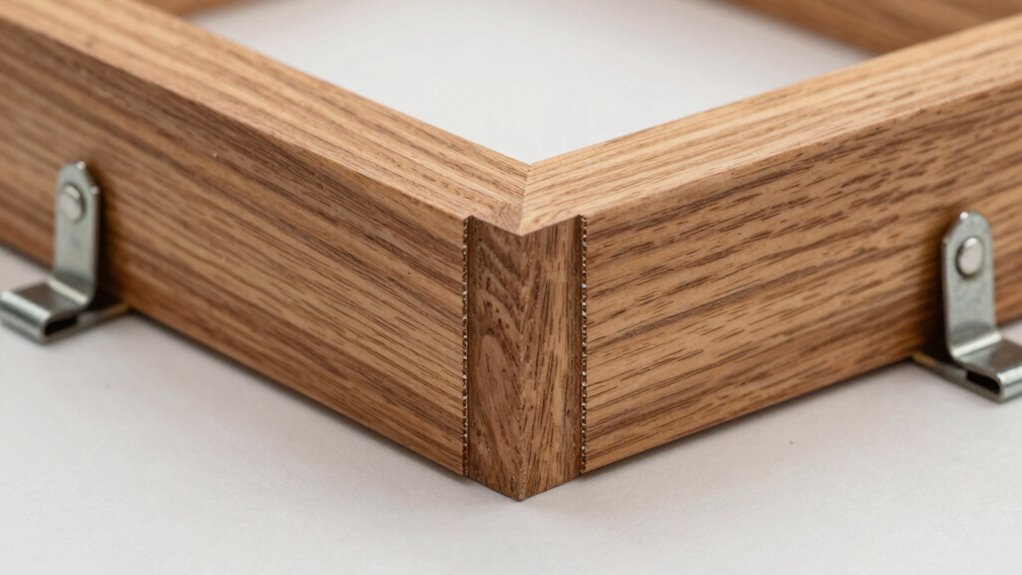
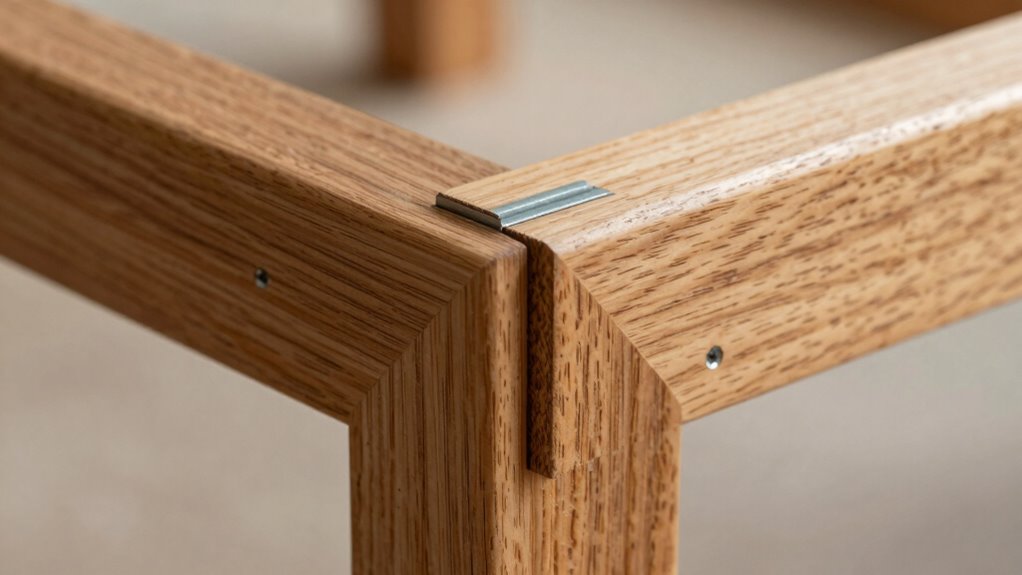
- Ensure precise miter cuts at 45 degrees for tight, seamless corners with minimal gaps.
- Use appropriate corner hardware like clamps or corner keys to secure joints during assembly.
- Maintain consistent alignment and pressure when joining frame components to prevent warping or gaps.
- Follow a proper sequence: assemble frame, then add matting, artwork, and secure glass last.
- Verify all joints are stable and flush before final securing to ensure a professional, durable finish.
Ever wondered how different parts of a frame come together seamlessly? It’s not just about choosing the right materials; it’s about understanding how each component plays a role in creating a polished, professional look. When you’re assembling a custom frame, paying close attention to the details of matting techniques and glass selection makes all the difference. These elements ensure your finished piece is both visually appealing and well-protected.
Start with matting techniques. The way you cut and position your matting influences how the artwork or photograph is presented. Precise cuts, whether bevel or square, help create a clean border that draws attention inward. A well-executed matting technique provides a smooth transition between the artwork and the frame, enhancing the overall aesthetic. Choosing the right mat board color and texture also impacts the visual balance, so consider how the mat complements the piece itself. Properly applied matting not only elevates the display but also prevents the artwork from touching the glass, reducing the risk of damage over time. Understanding framing components is essential for achieving a professional finish. Additionally, understanding how different framing components work together can help you troubleshoot any issues that arise during assembly, leading to a more durable and attractive finished product. Familiarity with these framing techniques can greatly improve your craftsmanship and the longevity of your finished piece.
Precise mat cuts and thoughtful color choices enhance presentation and protect artwork from glass contact.
Glass selection is just as crucial in the framing process. The type of glass you choose affects both the appearance and longevity of your piece. Standard glass offers clear visibility, but if glare or UV protection is a concern, options like non-glare or UV-filtering glass are better choices. These materials help preserve the artwork by reducing fading caused by light exposure. When joining the frame, ensure the glass fits snugly without forcing it into place, as loose or overly tight fits can cause stress on the frame or glass. Using the right hardware, like clips or glazing points, helps secure the glass and keeps everything aligned during assembly.
Joining the frame components requires precision and patience. Corners should be mitered accurately, with tight joints that don’t leave gaps. Clamps or corner keys can help hold everything in place while you secure the joints, leading to a more stable and professional finish. As you assemble, pay attention to the order of operations—start with the frame, then add the matting, followed by the artwork, and finally the glass. This sequence ensures each layer sits correctly and avoids unnecessary adjustments later. Knowing proper hardware and techniques for securing components is vital for creating a lasting, high-quality frame.
In the end, mastering these basics—matting techniques, glass selection, and precise joining—sets the foundation for a beautifully finished frame. Every step contributes to the stability, appearance, and preservation of your artwork. When you get these details right, your custom framing setup not only looks great but also protects your pieces for years to come.

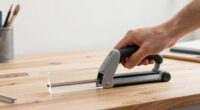
Miter Trimmer – Micro-Fine Slices Laminate Cutter for Precise Fit – Adjustable Trim Saw for 45 90 Degree Cuts – Picture Framing Saw for Perfect Miter Cuts
Miter Trim Tool: No more planning, sanding, and tear-out on pre-finished frame moldings with this revolutionary Trim Saw!…
As an affiliate, we earn on qualifying purchases.
As an affiliate, we earn on qualifying purchases.
Frequently Asked Questions
What Tools Are Best for Precise Frame Joints?
For precise frame joints, you should use tools like a miter saw or a mitre box for accurate cut angles, ensuring clean joinery techniques. A corner clamp or spring clamp helps hold pieces firmly in place during assembly, allowing for tight joints. Additionally, a doweling jig or biscuit joiner can enhance stability, especially for larger frames. Combining these tools with proper clamping methods guarantees precise, strong frame joints every time.
How Do Different Angles Affect Joint Strength?
You’ll find that the angle impact plays a significant role in joint durability. When you use a 45-degree angle, for example, the joint tends to be more stable and resilient, providing better support over time. Steeper or shallower angles can influence strength, but they might also introduce subtle nuances in how the joint withstands pressure. By carefully selecting the right angle, you guarantee your frame’s longevity and craft a sturdy, beautiful piece.
Can Frame Joints Be Repaired if Damaged?
Yes, frame joints can be repaired if damaged. To guarantee frame joint longevity, you should use proper repair techniques like re-gluing, reinforcing with corner brackets, or replacing damaged sections. Carefully assess the extent of damage before choosing a method. With the right approach, you can restore the strength and appearance of your frame, prolonging its life and maintaining its structural integrity.
What Common Mistakes Should Be Avoided in Frame Joining?
You should avoid common mistakes like neglecting decorative joint techniques or relying solely on outdated historical framing methods. Don’t skip proper measurements, as it leads to misaligned joints. Using inappropriate adhesives or fasteners can weaken the frame. Also, avoid rushing the process—precision and patience matter. Incorporate decorative joint techniques thoughtfully, blending tradition with your design, and adapt historical framing methods carefully to guarantee a sturdy, visually appealing frame that lasts.
How Does Material Type Influence Joint Selection?
Think of choosing joints as matching shoes to outfits—material compatibility is key. For example, using hardwood joints with softwood frames can lead to weak connections and reduced joint durability. You must select joint types that suit the material’s properties; metal joints work well with dense materials, while adhesives suit lighter, porous ones. Proper pairing ensures your frame stays sturdy over time, avoiding costly repairs or misalignments.
![Right Angle Clamp, Housolution [4 PACK] Single Handle 90° Aluminum Alloy Corner Clamp, Clamps for Woodworking Adjustable Swing Jaw, Woodworking Tools Photo Frame Vise Holder, Gifts for Men Dad](https://m.media-amazon.com/images/I/51fhtK3TMXL._SL500_.jpg)
Right Angle Clamp, Housolution [4 PACK] Single Handle 90° Aluminum Alloy Corner Clamp, Clamps for Woodworking Adjustable Swing Jaw, Woodworking Tools Photo Frame Vise Holder, Gifts for Men Dad
【Premium Quality Clamps for Woodworking】: Woodworking gifts for men. Sturdy 90 degree wood corner clamps, made of premium…
As an affiliate, we earn on qualifying purchases.
As an affiliate, we earn on qualifying purchases.
Conclusion
Mastering frame joining is like finding the perfect harmony in a symphony—you’ll create a structure that’s both sturdy and beautiful. When you pay attention to these basics, you set the stage for craftsmanship that stands the test of time. Remember, every joint is a note in your composition, and with precision, your finished piece will sing with confidence. Keep these principles close, and your framing will always hit the high notes.

Feekoon Glazier Point Driver, Glazier Setting Tool with 100 Push Points, Glazing Push Point Driver Tool for Framing Glass Picture Cross Stitch(Green,1 Pack)
Package Includes: You will receive a glazier point driver tool and 100 glazier points. Sufficient quantity to meet…
As an affiliate, we earn on qualifying purchases.
As an affiliate, we earn on qualifying purchases.

EesTeck 50 Pack Small Sawtooth Picture Hangers – Steel Picture Hanging Solutions with Screws, for Hanging Clock Paintings Artwork Frame Hooks (Black)
Durable Material: Made of high quality steel, rust resistant, smooth surface, strong, durable and long lasting use.
As an affiliate, we earn on qualifying purchases.
As an affiliate, we earn on qualifying purchases.