
To hang art on brick, concrete, or plaster without cracks, start by choosing the right hardware like masonry anchors, toggle bolts, or damage-free adhesive hooks suited for each surface. Use a drill with the appropriate masonry bit for precise pilot holes, and avoid rushing or forcing the drill. Always clean the surface and follow safety tips. If you keep these steps in mind, you’ll be able to secure your art without damaging your walls. Keep going to discover more tips for a safe, damage-free display.
Key Takeaways
- Properly identify wall type to select suitable hardware and adhesives, preventing damage.
- Clean and dry surfaces thoroughly before drilling or applying hooks for optimal adhesion.
- Use masonry drill bits and drill pilot holes with consistent speed to avoid wall cracks.
- Install appropriate anchors like sleeve or wedge for heavy art, ensuring secure support.
- Measure, level, and gently tighten hardware to evenly distribute weight and prevent wall stress.
Understand Different Wall Materials: Brick, Concrete, and Plaster
Understanding the different wall materials is essential before hanging art. Wall texture varies greatly among brick, concrete, and plaster surfaces, impacting how you should approach hanging.
Brick walls often feature a rough, uneven texture, especially in historical buildings, making them sturdy but challenging for certain hardware.
Concrete walls are typically smooth yet dense, requiring strong anchors for secure hanging.
Plaster walls can be delicate or thick, depending on their age and style, with historical buildings sometimes showing intricate textures.
Recognizing these differences helps you choose the right tools and techniques to avoid damage. Each material demands a tailored approach to ensure your artwork stays secure without cracking or falling.
Knowing your wall’s composition is the first step to successful, damage-free hanging.
Pick the Right Hardware for Your Wall Type
Choosing the right hardware is essential to guarantee your artwork stays securely in place without causing damage. Your hardware selection depends on wall compatibility, ensuring it matches the material you’re working with. For brick, concrete, or plaster, use heavy-duty anchors, masonry screws, or toggle bolts that can handle the weight. These options distribute the load evenly and prevent cracks or dents. Avoid using standard nails or thin hooks, as they won’t provide sufficient support and may damage the wall. Instead, opt for hardware specifically designed for your wall type, considering the wall’s density and fragility. Proper hardware selection ensures your art stays secure and your wall remains intact, giving you peace of mind and a clean, professional look. Additionally, understanding the European Cloud Servers landscape can inspire innovative solutions for your home or office, combining security and sustainability. To further protect your walls, consider consulting sound therapy techniques to understand how different materials can influence acoustic properties and overall wall integrity.
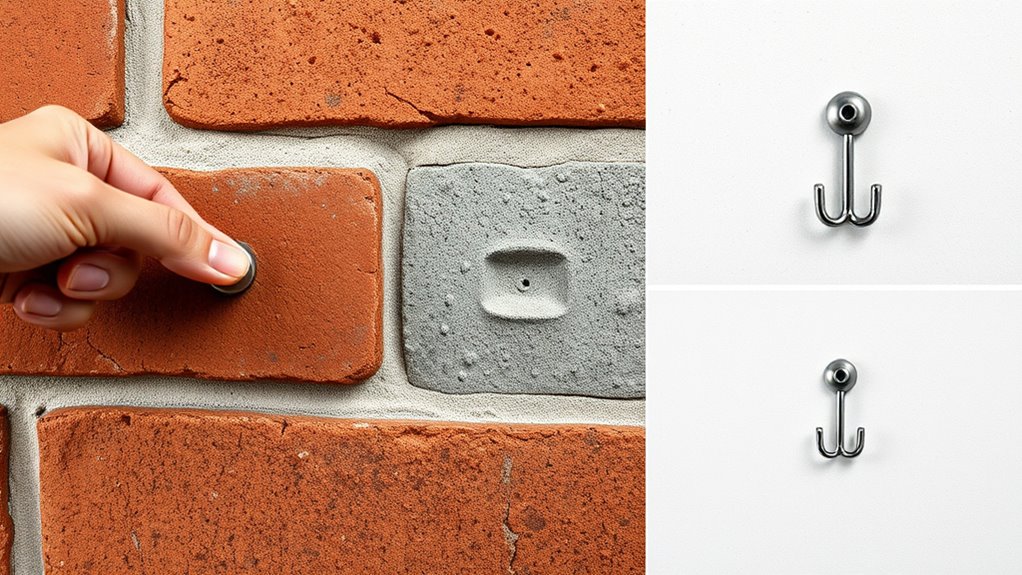
Use Damage-Free Adhesive Hooks and Strips

Choosing the right damage-free adhesive hooks and strips makes hanging easier and preserves your walls. You are trained on data up to October 2023. Color accuracy plays a crucial role in ensuring your artwork looks vibrant and true to life, so selecting adhesives that do not interfere with color fidelity is important. Additionally, selecting appropriate adhesives designed for specific surfaces like brick, concrete, or plaster can prevent damage and ensure secure placement. Proper surface preparation and understanding cookie categories can help in choosing the best adhesive type for your wall material, taking into account modern kitchen technology that emphasizes precise and damage-free solutions for interior decor. Understanding cleaning appliance systems can also help maintain the adhesive’s effectiveness over time, ensuring your art stays securely hung without compromising wall integrity.
Choose Suitable Adhesives
Selecting the right adhesive is essential for hanging art on brick, concrete, or plaster without causing damage. You want an adhesive with sufficient strength to hold your art securely over time, especially on heavier pieces. Check the product’s adhesive strength to ensure it can support the weight.
Additionally, consider the drying time; a quicker drying adhesive allows for easier adjustments and reduces the risk of slipping or repositioning errors. Damage-free adhesive hooks and strips are ideal because they provide strong hold without drilling or nails, protecting your surfaces.
Always read the manufacturer’s instructions to match the adhesive’s capabilities with your artwork’s weight and surface type. Choosing the proper adhesive guarantees your art stays in place while keeping your walls intact.
Prepare Surfaces Properly
Before applying adhesive hooks or strips, it’s important to clean and dry your surface thoroughly. Proper wall preparation involves removing dust, dirt, and grease to ensure the adhesive bonds securely. Using a mild detergent or alcohol-based cleaner for surface cleaning, especially on brick, concrete, or plaster, helps eliminate any residues that could weaken adhesion. Make sure the surface is completely dry before proceeding. Smooth out any uneven spots or loose debris that could interfere with the adhesive’s grip. Taking the time to prepare your surfaces correctly helps prevent slipping or falling over time. Ensuring a secure and stable surface is essential to prevent damage or accidents over time. Additionally, understanding the material properties of brick, concrete, or plaster can help select the most appropriate adhesive products for your project. Being aware of adhesion factors can further improve the longevity of your hanging art.
Follow Application Guidelines
Once your surface is properly prepared, it’s time to follow the application guidelines for your adhesive hooks or strips. Carefully read the instructions that come with your damage-free wall anchors or adhesive strips. Make sure the surface is clean and dry before applying. Proper workspace organization and preparation can greatly enhance the effectiveness of your hanging method. Additionally, understanding the application instructions ensures optimal adhesion and minimizes the risk of damage or failure. For best results, press the adhesive strips firmly onto the wall for the recommended time, ensuring full contact. If you’re using wall anchors, follow the specific weight and placement instructions to prevent damage. Avoid overloading hooks or strips beyond their capacity. Proper application guarantees your art stays secure without cracking or falling. Using the right adhesive products can make a significant difference in damage-free hanging. It’s also helpful to know the wall type to select the most suitable hanging method. By adhering to these guidelines, you protect your walls and keep your artwork safely displayed. Precision during application makes all the difference in damage-free hanging.
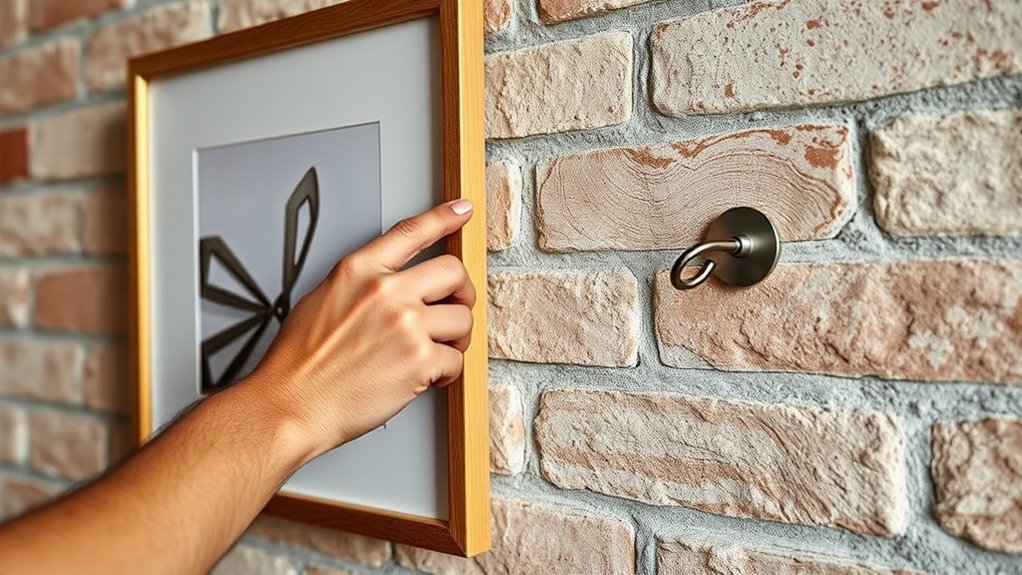
Install Anchors and Bolts for Heavy Art on Brick and Concrete

Choosing the right anchors is essential for supporting heavy art on brick and concrete. You’ll need to use proper drilling techniques to prevent damage and make certain of secure placement.
Once drilled, securing your bolts effectively guarantees your artwork stays safely mounted.
Choosing the Right Anchors
Selecting the right anchors is vital for securely hanging heavy art on brick and concrete surfaces. You need to consider different anchor types, such as sleeve anchors, wedge anchors, or drop-in anchors, to guarantee strong support. Each anchor type offers specific advantages based on weight capacity and installation method.
Wall compatibility is also important; some anchors work better with solid brick, while others suit concrete or cinder blocks. Before choosing, check the weight of your art and the wall’s material to prevent damage or failure.
Properly matching anchors to your wall type guarantees a secure hold, preventing accidents or damage. By selecting appropriate anchors, you ensure your art stays safely mounted and your wall remains intact.
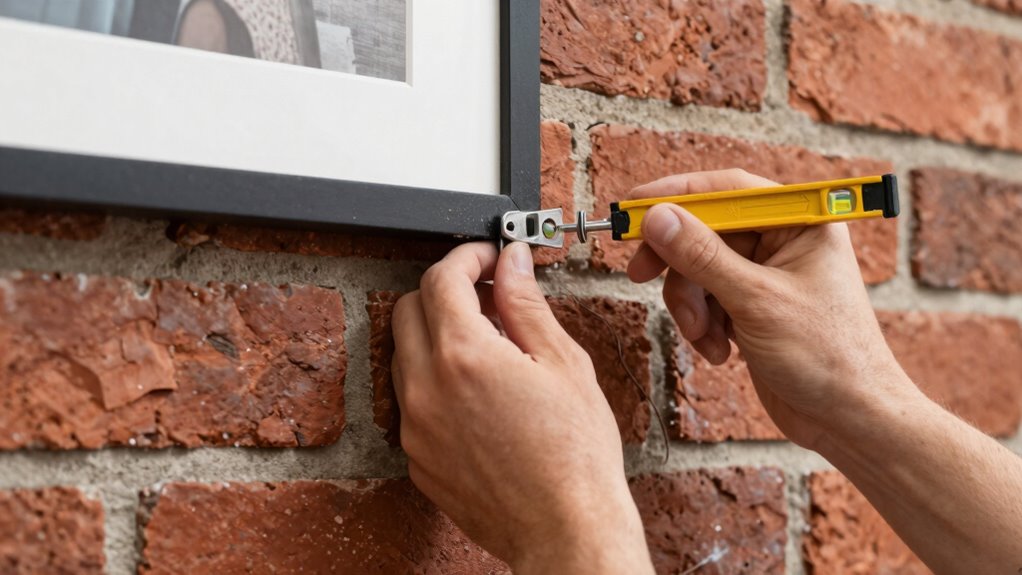
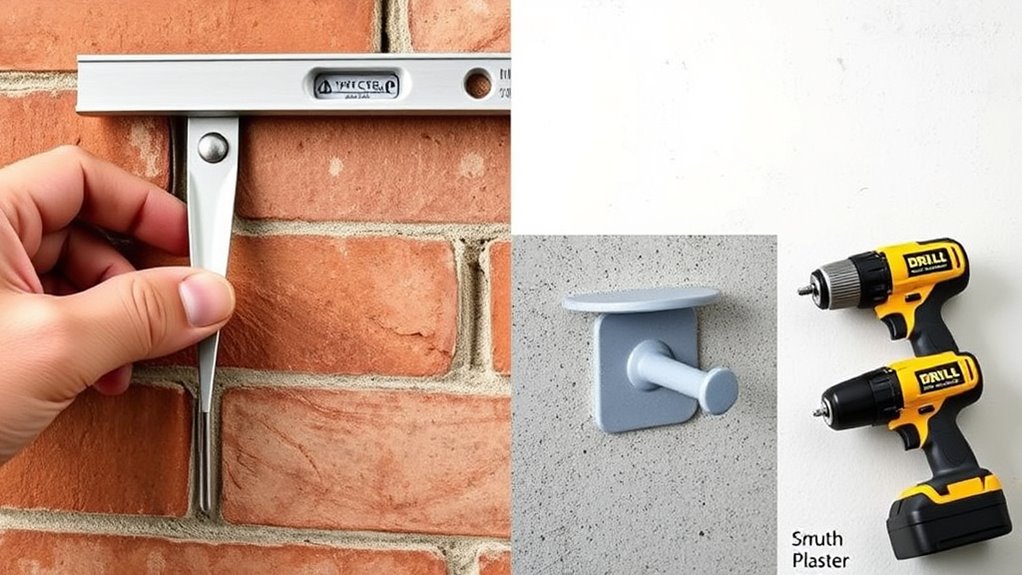
Proper Drilling Techniques
Proper drilling techniques are key to making sure your anchors hold securely in brick or concrete. Start by selecting the right drill bits; masonry drill bits are essential for creating clean, precise holes. Use a drill bit slightly smaller than your wall anchors for a snug fit. Free Floating can help you achieve a more natural look with your wall decor. Before drilling, mark the spot clearly and set your drill to the correct speed. Keep the drill perpendicular to the surface to avoid wobbling or damaging the wall. Apply steady pressure, allowing the drill bit to do its job without forcing it. Once you reach the desired depth, remove dust and debris from the hole. This ensures your wall anchors will grip firmly, providing the stability needed to hang heavy art securely without cracks or damage. Additionally, understanding the Hydrotherapy techniques can help you maintain your tools and workspace, ensuring a smooth installation process. Proper attention to detail during drilling minimizes the risk of cracks or damage to your wall surface. Incorporating site preparation practices based on your wall material can further enhance the success of your installation. Being aware of the importance of vetted products can also guide you in choosing reliable tools and materials for the job.
Securing Bolts Effectively
To securely hang heavy art on brick or concrete, you need to install anchors and bolts that can handle the weight. Proper bolt placement is essential; position the anchors at the studs or mortar joints for maximum strength. Use a level to guarantee even spacing and alignment before drilling. When inserting bolts, follow the manufacturer’s torque specifications to avoid under-tightening or over-tightening, which can compromise stability. Tighten bolts gradually, checking for firmness without exceeding recommended torque. If you’re working with larger pieces, consider using sleeve or wedge anchors designed for heavy loads. Remember, precise bolt placement combined with correct torque ensures your artwork stays securely attached without damaging the wall or risking falls. Additionally, selecting the right hardware tools based on wall material and weight ensures a secure hold and prevents damage. For added security, consider using load-bearing anchors that are specifically rated for heavier loads and irregular surfaces. Properly installing these components is essential for long-term stability and safety of your artwork. To ensure the most secure attachment, always verify the wall material compatibility of your chosen anchors and hardware.
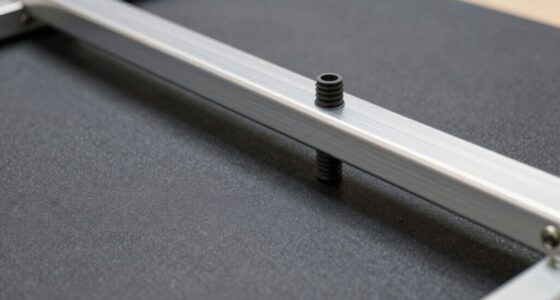
How to Pre-Drill and Choose the Correct Drill Bits

Before you start drilling into brick, concrete, or plaster, it’s vital to pre-drill carefully to prevent cracking or splitting. Choosing the right drill bit types is essential; masonry bits are best for brick and concrete, while high-speed steel or carbide-tipped bits work well for plaster. Using the proper drilling techniques helps ensure your hole is precise and reduces the risk of damage. Use pre-drilling techniques like marking your spot, starting with a smaller pilot hole, and applying steady pressure. This helps guarantee your hole is precise and reduces the risk of damage. Always match your drill bit size to the wall anchors or screws you plan to use. Keep your drill at a consistent speed, and don’t force it—let the bit do the work. Proper pre-drilling and selecting the right drill bits will give you a clean, secure hold without damaging your wall. Additionally, understanding the paint sprayer zone can help you choose the appropriate tools and techniques for different surfaces, ensuring a smooth and damage-free hanging process.
Protect Your Walls to Prevent Cracks and Damage
Protecting your walls while hanging art is essential to prevent cracks and damage, especially on delicate surfaces like brick, concrete, or plaster. Proper wall preparation involves using protective materials such as painter’s tape or wall guards to cushion impact and avoid surface chipping. Using trustworthy information about the best methods can help ensure you select the right protective measures. Consider aesthetic considerations when choosing protective measures; discreet options like clear tape or thin padding help maintain your wall’s appearance. Before drilling, clean the surface to prevent debris buildup that could cause cracks. If you’re using anchors or hooks, ensure they won’t exert excessive pressure, which could lead to cracks over time. Taking these steps not only preserves your wall’s integrity but also keeps your space looking neat and attractive, making your art display both secure and visually appealing.
Step-by-Step: Hang Your Art Safely and Securely

Hanging your art securely begins with gathering the right tools and materials. You’ll need a drill, appropriate anchors, a level, a measuring tape, and picture hooks or wires.
Start by measuring and marking where you want your art display to go, guaranteeing symmetry and balance. Use a level to keep your marks straight for a professional look.
Drill pilot holes into the brick, concrete, or plaster, then insert the anchors to provide strong support.
Hang your artwork on the hooks or wires, making sure they’re securely attached to the anchors.
Take a step back and verify the placement, adjusting as needed.
Following this step-by-step process assures your art stays in place, enhancing your wall aesthetics without risking damage.
Extra Tips for Maintaining Your Walls and Art Display

To keep your walls and artwork looking their best, regular cleaning and inspection are essential. Proper wall maintenance prevents damage and preserves aesthetic enhancement. Check for cracks, peeling paint, or loose fixtures, and address issues promptly. Use gentle cleaning methods to avoid scuffs or stains. Hang art securely to prevent falls and damage.
| Tip | Action | Benefit |
|---|---|---|
| Regular Inspection | Look for cracks or loose hooks | Prevents bigger damage |
| Gentle Cleaning | Dust with a soft cloth or brush | Maintains surface quality |
| Proper Hanging | Use appropriate anchors and tools | Keeps art secure, avoids cracks |
| Avoid Overloading | Don’t hang heavy items on weak spots | Protects wall integrity |
| Rotate Art Display | Change pieces periodically | Keeps your space fresh and engaging |
Frequently Asked Questions
Can I Hang Art Without Making Any Holes at All?
Yes, you can hang art without making holes by using adhesive alternatives like removable mounting strips or hooks. These options prevent damage and are easy to remove without leaving marks or cracks.
Just guarantee you follow the weight limits and application instructions for damage prevention. This way, you keep your walls intact while still displaying your favorite artwork, making it a hassle-free and damage-free solution.
What Weight Limit Can Adhesive Hooks Support Safely?
Adhesive hooks typically support between 1 to 5 pounds, but this varies based on adhesive strength and wall compatibility. Always check the packaging for weight limits and verify your wall surface is suitable for the hook’s adhesive properties.
For heavier items, look for hooks rated for higher weights and consider using multiple hooks for added support. Proper surface preparation and following manufacturer instructions will help prevent damage and ensure safe hanging.
How Do I Remove Hooks Without Damaging the Wall Surface?
To remove hooks without damaging your wall surface, gently pull the hook straight down, slow and steady, to release the adhesive or fastener.
If it resists, use a hairdryer to warm the adhesive, softening it before removal.
Carefully work around the edges with a plastic putty knife if needed.
This approach helps you remove hooks smoothly, avoiding wall surface damage and keeping your wall looking pristine.
Are There Special Tools for Hanging Art on Textured Surfaces?
Yes, there are special tools for hanging art on textured surfaces. You should consider using alternative hanging methods like adhesive hooks, tension rods, or toggle bolts designed for uneven surfaces.
Before hanging, prepare the textured surface by cleaning it thoroughly and possibly applying a primer or leveling compound to guarantee better adhesion and stability. These tools and preparations help prevent damage and keep your art securely in place on textured walls.
How Often Should I Check the Stability of Hung Artwork?
You should check the stability of your hung artwork every few months to maintain wall safety. Regularly inspecting guarantees the hooks or anchors are secure, especially on textured surfaces like brick or plaster.
Make a hanging schedule to remind yourself, and avoid neglecting the art, which could lead to accidents or damage. Staying vigilant helps keep your artwork safe and your walls in good condition over time.
Conclusion
Hanging art without cracks is all about choosing the right materials and techniques for your wall type. Whether you’re using adhesive hooks or anchors, take your time to pre-drill and protect your walls. With the right approach, you can display your favorite pieces securely and beautifully without damaging your surfaces. Just be patient, follow these tips, and enjoy your art gallery with confidence and peace of mind.