
Underpainting acts as a hidden foundational layer that shapes the final look of your artwork. By establishing tonal values and controlling light and shadow, it makes your colors appear more vibrant and luminous when layered over it. This technique adds depth, harmony, and energy to your painting, giving it a glowing effect. If you keep exploring, you’ll discover how mastering underpainting can transform your work into a stunning, radiant masterpiece.
Key Takeaways
- Underpainting establishes a tonal foundation that influences how subsequent colors interact and vibrate on the canvas.
- Thin, transparent layers in underpainting create a luminous base that enhances the brightness of top paint layers.
- Using muted or monochromatic underpainting allows vibrant colors layered on top to appear more glowing and rich.
- Proper layering and glazing techniques in underpainting add depth and vibrancy, making colors appear to radiate.
- Mastering the underpainting process results in artworks where colors seem to glow with a luminous, three-dimensional quality.
82Pcs Professional Oil Painting Set with Easel Box, 24 Rich Oil Colors & 10 Hog Brushes,Palette Knives, Canvases Complete Art Supplies Kit for Beginners & Artists
【All-in-One Oil Painting Kit – 82 Pieces Included】Unleash your creativity with this comprehensive ARTALLY Oil Painting Set. Everything…
As an affiliate, we earn on qualifying purchases.
As an affiliate, we earn on qualifying purchases.
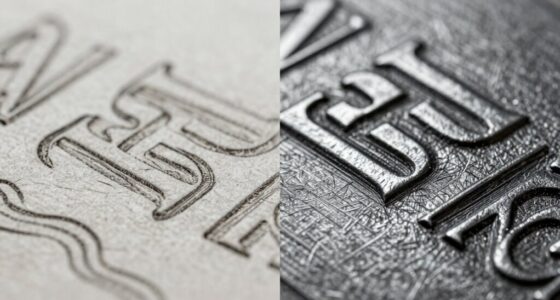
What Is Underpainting and Why Does It Matter?

Underpainting is a foundational step in the painting process that involves creating a preliminary monochromatic or tonal sketch on your canvas. This initial layer guides your color layering, helping you build depth and harmony in your artwork. By establishing tones early, you set the mood and atmosphere you want to evoke, making the final colors more vibrant and cohesive. Underpainting acts as a blueprint, allowing you to experiment with composition and values before committing to full color. It also enhances the overall visual impact, as the underlayer influences how subsequent paint layers interact. Essentially, underpainting is vital because it provides structure and mood, ensuring your finished piece feels balanced and emotionally resonant. Additionally, understanding the importance of value contrast can significantly improve the depth and realism of your artwork. Recognizing how underpainting techniques influence the final appearance can further elevate your creative process, especially when considering how color harmony interacts with the underlying tones. Moreover, employing auditory processing strategies from speech therapy concepts can help artists develop better focus and attention to detail during the creative process. Incorporating visual planning methods can also assist in translating your underpainting into a compelling finished piece, ensuring coherence from initial sketch to final flourish.
Geelin 9 Pcs Pottery Glaze Brushes Ceramic Brushes Set for Glazing Different Shapes for Pottery Acrylic Watercolor Wool Bristle Art Paintbrush Sets for Painting Artists Rock Adults
Quality Material: our paint brushes for acrylic painting are made of goat tail hair for maximum glaze absorbency,…
As an affiliate, we earn on qualifying purchases.
As an affiliate, we earn on qualifying purchases.
Discover the History and Origins of Underpainting

The practice of creating preliminary sketches beneath finished artworks dates back to ancient civilizations, where artists sought to establish composition and tonal values before applying final pigments. During the Renaissance, underpainting gained prominence as artists refined their techniques, emphasizing tonal groundwork to build depth and realism. This period marked the Renaissance origins of underpainting, influencing European art for centuries. Additionally, the use of traditional healing methods in art practices has parallels with Indigenous wellness traditions that incorporate natural elements for holistic health. As oil painting evolved, artists adopted layered approaches, using underpainting to map out light, shadow, and form before adding color. This method allowed for greater control and subtlety in their work, showcasing the importance of layered painting techniques in achieving luminous effects. Furthermore, the use of translucent glazes in underpainting contributed to the creation of depth and vibrancy in finished artworks. The development of optical effects through underpainting techniques further enhanced artists’ ability to depict realistic lighting and atmospheres. Over time, underpainting became a key step in creating luminous, vibrant artworks, forming the foundation for modern techniques. Its historical roots reveal how artists harnessed this hidden layer to enhance their mastery of light and color.

mph Underpainting Face Highlight & Contour Palette, Cream Face Palette, Buildable, Natural Finish (Medium)
A face palette that corrects, contours, and highlights to sculpt and define natural features
As an affiliate, we earn on qualifying purchases.
As an affiliate, we earn on qualifying purchases.
Tools and Materials You Need for Underpainting

To create an effective underpainting, you’ll need a selection of essential tools and materials that set the foundation for your artwork. Choosing the right brush selection is vital; opt for brushes with firm bristles that hold paint well and allow for smooth application. You’ll also need paints with the right consistency—thinned with water or medium to create a transparent, fluid layer that promotes depth. Use a palette to mix your colors and a palette knife for precise blending. A good-quality canvas or panel provides a sturdy surface, while a sketching pencil helps outline your composition. Keep a spray bottle nearby to mist your paints if they begin to dry out. Proper preparation of your materials ensures your underpainting is smooth, controlled, and ready for subsequent layers. Additionally, selecting appropriate painting mediums can enhance the flow and adhesion of your paint, leading to a more cohesive final piece. Being mindful of material quality is essential because it directly impacts your control and the longevity of your artwork. Using high-quality supplies can significantly improve the overall outcome and durability of your underpainting. Paying attention to material compatibility is also crucial for achieving a seamless layering process and avoiding issues like cracking or peeling. These tools and materials guarantee your underpainting is smooth, controlled, and ready for subsequent layers.

Glow Cubed Glow in The Dark Artist Professional Oil Paint Luminescent Phosphorescent Self-Luminous Paint (White White, 22 ml)
SPEND A LITTLE TIME, MAKE AND ENJOY A BRIGHT GLOW OIL PAINTING, – create brilliant glow colors and…
As an affiliate, we earn on qualifying purchases.
As an affiliate, we earn on qualifying purchases.
Exploring Different Styles and Approaches to Underpainting

You can experiment with classical techniques that emphasize precise layering or try modern approaches that focus on spontaneity and bold strokes. Incorporating layering techniques can help build depth and richness in your underpainting, regardless of your chosen style. Choosing your color palette strategically can influence the mood and depth of your underpainting, whether you prefer muted tones or vibrant hues. Additionally, playing with texture and transparency allows you to create unique visual effects that enhance your overall composition. Paying close attention to detail during your process ensures that your underpainting effectively supports the finished artwork’s vibrancy and harmony. Exploring color theory can further refine your choices and elevate your work. Moreover, understanding the importance of balanced composition can guide your choices in color and texture application, resulting in a more unified final piece.
Classical vs. Modern Techniques
Classical and modern underpainting techniques differ markedly in both approach and purpose, reflecting shifts in artistic philosophy and technology. Classical methods emphasize meticulous brushwork techniques and multiple layers of pigment layering to build depth and luminosity. Artists often used transparent glazes to achieve rich, harmonious tones, focusing on precise detail. In contrast, modern techniques tend to prioritize spontaneity and experimentation, sometimes utilizing broader strokes and fewer layers. You might see modern artists applying underpainting more loosely, with quick, expressive brushwork that captures movement and mood. While classical approaches aim for smooth distinctions and subtle gradations, modern methods often embrace visible brushstrokes and bold contrasts. Both styles serve to create luminous effects, but they differ in execution and underlying philosophy. Additionally, advancements in art technology have enabled contemporary artists to explore new mediums and digital tools that influence underpainting styles today. Incorporating innovative digital tools has expanded the possibilities for creating luminous effects and experimenting with different textures and layers.
Color Palette Strategies
Choosing the right color palette for underpainting sets the foundation for the entire artwork and can considerably influence its mood and depth. Your approach to color harmony guides how these initial tones interact and enhance subsequent layers. Focus on pigment selection to achieve desired effects—warm colors create energy, while cool tones evoke calmness. Consider using monochromatic schemes for subtle progressions or complementary colors for vivid contrast. Experiment with muted, earthy hues for realism or bold, saturated shades for expressive impact. Remember, the palette you choose should align with your overall vision, establishing a cohesive tone early on. Being mindful of color psychology can further enhance the emotional impact of your underpainting, guiding viewers’ perceptions and responses. Additionally, exploring different stylistic approaches can help you develop a unique visual language that resonates with your artistic intent.
Texture and Transparency
Building on your color palette, experimenting with texture and transparency can dramatically influence the mood and depth of your underpainting. Use varied brush techniques to create different textures, from smooth washes to rough, expressive strokes. Incorporating layered application techniques allows for richer visual effects and greater control over the final outcome. Transparency plays a key role; thin, glazes allow underlying layers to shine through, adding luminosity and complexity. Pay attention to paint drying times—wet paint can be manipulated for blending or creating subtle shifts, while dry layers help build structure and contrast. Understanding juicing techniques can inspire you to think of your paint layers like layered juices, where each adds flavor and depth. By carefully managing transparency and opacity, you can achieve a sense of depth and luminosity that enhances the overall vibrancy of your work. Combining these approaches, you can craft an underpainting that offers visual interest and a sense of depth before adding final colors. Mastering texture and transparency gives you control over how light interacts with your painting, ultimately enhancing its vibrancy and emotional impact.
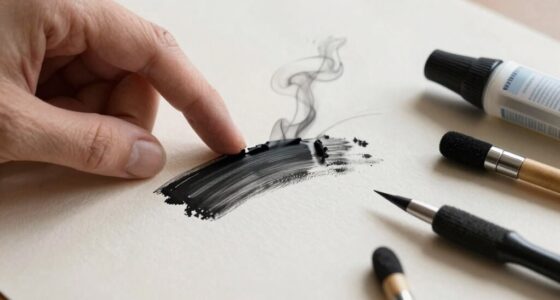
Follow These Steps to Create an Effective Underpainting

To create an effective underpainting, start by selecting a suitable color palette that matches the mood and composition of your artwork. This foundation guides your color mixing, ensuring harmonious tones later. Use simple brush techniques, such as broad strokes, to lay down your values quickly. Focus on establishing light and shadow rather than details, which allows your underpainting to set the stage for vibrant colors. To add depth, consider this approach:
| Step | Tip |
|---|---|
| Choose base colors | Keep it simple and muted for underpainting |
| Apply broad strokes | Use large brushes for quick coverage |
| Focus on values | Emphasize contrast to define forms |
Mastering these steps ensures your underpainting becomes a strong, luminous foundation.
See How Underpainting Brightens and Adds Depth to Colors

Underpainting serves as a powerful tool to brighten and add depth to your colors. When you layer a subtle, monochromatic underpainting, it creates a foundation that influences how subsequent colors blend and interact.
This process enhances color blending by allowing you to build richness gradually, making hues appear more vibrant and luminous. Using specific brushwork techniques, like soft strokes or glazing, you can manipulate the underlayer to create a sense of depth and dimension.
Pro Tips for Mastering Underpainting Techniques

Mastering underpainting techniques requires attention to detail and deliberate choices. Focus on layering techniques to build depth gradually, starting with thin, transparent washes that allow underlying colors to shine through. Use a limited palette initially to establish a harmonious foundation.
When applying successive layers, guarantee each is dry before adding the next to prevent muddying colors. Practice effective color blending by smoothly shifting between tones, which enhances luminosity and realism. Experiment with different brushstrokes and tools to achieve varied textures.
Keep your underpainting subtle; it should serve as a glowing backbone beneath your final colors. Regularly step back to assess your work, adjusting layers and blending where needed. With patience and precision, you’ll create vibrant underpaintings that elevate your entire piece.
Famous Artworks That Showcase Underpainting Magic

| Artwork | Artist | Key Technique |
|---|---|---|
| Mona Lisa | Leonardo da Vinci | Layering effects, pigment prep |
| The Night Watch | Rembrandt | Underpainting for depth |
| The Starry Night | Vincent van Gogh | Vibrant underlayers |
| The Girl with a Pearl Earring | Johannes Vermeer | Subtle tonal underpainting |
Frequently Asked Questions
How Long Does an Underpainting Typically Take to Dry?
The drying time for an underpainting usually takes about 1 to 3 days, depending on the paint layers you use.
Oil paints can take longer to dry, often up to a week or more, especially with thicker layers.
You should wait until the underpainting is fully dry to make certain your subsequent paint layers adhere properly and don’t disturb the underlying work.
Patience is key for a smooth, vibrant final result.
Can Underpainting Be Used With Digital Art Techniques?
Yes, you can use underpainting techniques with digital art. You’ll incorporate digital layering to create a base, similar to traditional underpainting, and then build upon it with color mapping to add depth and vibrancy.
This approach allows you to establish tonal values early, guiding your digital brushwork. By mimicking traditional underpainting, you can achieve richer, more dynamic results in your digital artwork.
What Are Common Mistakes to Avoid in Underpainting?
You should avoid overworking your underpainting, as it can hinder effective color blending. Use a consistent brush technique to keep your layers smooth and avoid muddy colors.
Be cautious not to lay down too much paint at once, which can obscure your initial tones. Always let layers dry properly before adding new ones, and stay mindful of how your brushwork influences the overall glow of your colors.
How Does Underpainting Influence the Final Color Palette?
Your underpainting shapes the final color palette by establishing a tonal foundation, guiding color harmony throughout your piece. It influences how vibrant or muted your colors appear, creating depth and unity.
When you carefully choose your underpainting hues, you’re ensuring the final layers work seamlessly together, resulting in a more cohesive and luminous artwork. Skipping this step can lead to less harmonious colors and a flatter overall appearance.
Is Underpainting Suitable for All Painting Mediums?
Underpainting works well with oil techniques because it allows you to build depth and richness through layered colors.
While it’s less common in acrylic layering due to quicker drying times, you can adapt underpainting methods by using slow-drying mediums or layering transparents.
However, it’s not suitable for all mediums, especially fast-drying acrylics, as the initial layer may dry before you can develop complex color interactions.
Conclusion
Now that you know the secrets behind underpainting, you can start experimenting with it yourself. By layering and building depth, you’ll see your colors come alive and your artwork gain a stunning glow. Don’t be afraid to try different styles and techniques—you’ll discover what works best for you. With practice, underpainting will become a powerful tool in your artistic journey, helping you create more vivid, mesmerizing pieces that truly stand out.