Cyanotype prints showcase stunning, deep blue images created through a simple photographic process using iron salts. You coat paper or fabric with a light-sensitive solution, place objects or negatives on top, then expose it to UV light. The chemicals react, revealing a vivid blue tone that’s hard to forget. If you’re curious about making your own cyanotypes and exploring their artistic potential, keep exploring—you’ll discover how to achieve striking results and creative techniques.
Key Takeaways
- Cyanotype prints are characterized by their distinctive Prussian blue color created through UV exposure of iron-based chemicals.
- The process involves coating a surface with a light-sensitive solution, arranging objects or negatives, then exposing to UV light.
- Proper rinsing and fixing are essential to develop the vibrant blue image and ensure longevity of the print.
- Common issues include uneven exposure and fading over time, which can be managed through proper handling and storage.
- Cyanotypes can be creatively combined with mixed media, digital techniques, and experimental methods for unique artistic results.
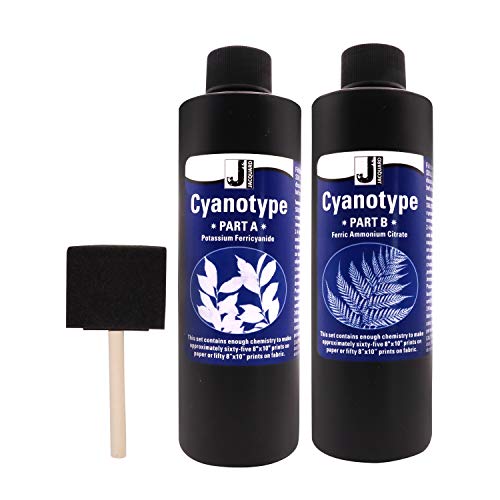
Jacquard Cyanotype Kit – Sun Printing Sensitizer Set for Paper & Fabric – Complete Blueprint Art Kit with Sponge Brush – Cyanotype Supplies for Photographers, Crafters & Kids
- Complete Cyanotype Kit: Includes sensitizer set and applicator
- Suitable for Natural Surfaces: Works on paper, fabric, wood, leather
- Easy Sun Printing: Mix, apply, expose, and create in minutes
As an affiliate, we earn on qualifying purchases.
As an affiliate, we earn on qualifying purchases.
Explore the History of Cyanotype Photography

Cyanotype photography has a fascinating history that dates back to the 19th century, when it was first developed as a simple and affordable way to create photographic images. Its history evolution reveals how it shifted from a scientific curiosity to an artistic medium. Early pioneers like Sir John Herschel, who invented the process in 1842, laid the foundation for its use. Over time, notable artists such as Anna Atkins embraced cyanotypes to produce botanical illustrations, elevating the process to fine art. The technique’s accessibility and distinctive blue hue made it popular among amateurs and professionals alike. As cyanotype photography evolved, it gained recognition for its unique aesthetic, inspiring contemporary artists to experiment with its expressive potential. Color fidelity and the ability to produce detailed images contributed to its enduring appeal. Its rich history continues to influence modern photographic practices, especially through innovations that enhance its visual impact and creative possibilities. Additionally, the process’s reliance on sunlight exposure contributed to its simplicity and widespread adoption, demonstrating its role as an accessible alternative photographic process. Moreover, ongoing research into chemical formulations has expanded the technique’s versatility and safety for modern practitioners.
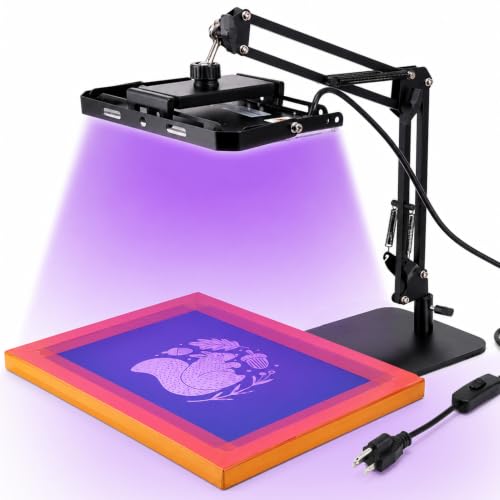
Caydo 96 LEDs UV Light 395nm for Screen Printing, Leakage-Proof Safety
- Wavelength: 395nm UV light for screen printing
- Power: 50W UV exposure lamp
- Size: 13cm x 23.5cm coverage area
As an affiliate, we earn on qualifying purchases.
As an affiliate, we earn on qualifying purchases.
How Cyanotypes Are Made Chemically

To create a cyanotype, you start by mixing two key chemicals: ferric ammonium citrate and potassium ferricyanide. When combined, these chemicals undergo specific chemical reactions that produce a light-sensitive compound. This compound, when exposed to ultraviolet light, reduces to form Prussian blue pigment, which is responsible for the signature blue hue of cyanotypes. During exposure, the UV light triggers a chemical change, turning the mixture into a soluble form that reveals the image. After exposure, washing the print in water removes unreacted chemicals, allowing the blue pigment to develop fully. This process of pigment development is essential, as it transforms the initial chemical reactions into the vibrant, durable blue image we recognize as a cyanotype. Additionally, understanding the light-sensitive compounds involved helps artists control the exposure time and achieve desired artistic effects. The chemical reactions involved are also influenced by the exposure time, which artists can manipulate to alter the final appearance of their print. Moreover, mastering the chemical process enables artists to refine their techniques and create consistent, striking results. A deeper understanding of chemical reactions can also help troubleshoot issues and improve print quality. Recognizing the role of UV light in initiating these reactions is crucial for optimizing exposure and image clarity.
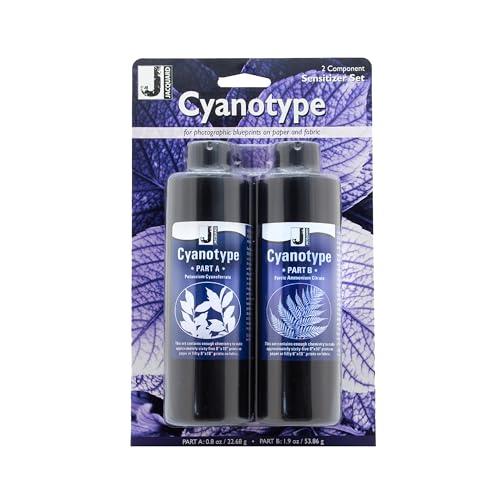
Jacquard Cyanotype Sensitizer Set
- Photographic process type: Ancient cyanotype method
- Print color: Prussian blue monochrome
- Suitable surfaces: Any natural fiber
As an affiliate, we earn on qualifying purchases.
As an affiliate, we earn on qualifying purchases.
Essential Materials for Cyanotype Printing

You’ll need a few essential materials to create cyanotypes successfully. Historically, cyanotype’s origins date back to the 19th century, showcasing early material innovation with ferric salts and photographic papers.
Today, the core materials include a cyanotype sensitizer solution made from ferric ammonium citrate and potassium ferricyanide, which you’ll mix to prepare your printing surface. You’ll also need a flat, non-porous surface like glass or plastic for coating your paper or fabric.
The paper itself should be a sturdy, smooth surface that absorbs the solution evenly. Additionally, a protected workspace away from direct sunlight during coating and drying is vital.
Modern innovations have made the process more accessible, but understanding these foundational materials connects you to cyanotype’s rich historical context and enduring appeal.

ZENFUN 3 Packs Rim Cone Pottery Tool, 3 Sizes Ceramic Rim Shaper Cone, 3D Printed Pottery Tool Fixing Rims for Potters Clay Artists Beginners (XS,S,M)
- Multiple Sizes Included: XS, S, M for versatile shaping
- Size Details: Different dimensions for various needs
- Premium ABS Material: Flexible, durable, easy to clean
As an affiliate, we earn on qualifying purchases.
As an affiliate, we earn on qualifying purchases.
Step-by-Step: Making Your First Cyanotype

Start by gathering all your materials and tools so you’re ready to begin. Next, prepare and coat your paper with the cyanotype solution, ensuring an even layer. Be sure to handle the chemicals carefully and in a well-ventilated area. To improve your results, consider techniques for optimizing exposure and making your writing more engaging. Additionally, pay attention to cleaning appliances and systems, since a well-maintained environment can help you work more effectively. Proper relationship building and parenting strategies can also enhance your creative environment, fostering patience and focus. Finally, arrange your image on the coated paper and develop it in sunlight to reveal your print. Remember that Free Floating techniques can be used to create unique effects in your cyanotype process.
Gather Materials and Tools
Gathering the right materials and tools is essential before you begin creating your cyanotype. You’ll need specific items to ensure a smooth process, from preparing your workspace to experimenting with different substrates. Besides traditional paper, consider alternative substrates like fabric or textured surfaces to add unique effects. Digital editing can help plan compositions before exposure, saving time and reducing errors. Here’s what you’ll need:
| Item | Purpose | Notes |
|---|---|---|
| Cyanotype chemicals | Coating substrate | Mix in low light, store properly |
| Brushes or rollers | Applying chemicals | Use for even coating |
| Exposure surface | UV light source | Sunlight or UV lamp |
| Timer | Track exposure time | Ensure consistent results |
| Protective gear | Safety during mixing and coating | Gloves, apron, mask |
| Chemical safety | Ensuring proper handling and storage | Follow safety guidelines to prevent accidents |
With these tools, you’re ready to create stunning blue-toned prints.
Prepare and Coat Paper
Once you’ve assembled your materials, it’s time to prepare your paper for coating. Start by choosing a suitable paper, preferably smooth, heavyweight, and uncoated, to guarantee even absorption of the cyanotype solution. When coating, use your preferred technique—brushes work well for controlled application, while foam rollers can create smoother, more consistent layers. Apply the cyanotype mixture evenly across the surface, avoiding drips or thick spots. Make sure to coat both sides if desired, but focus on the side you’ll print on. Work in a dim or subdued light to prevent premature exposure. Allow the coated paper to dry completely in a dust-free environment before proceeding, assuring a smooth, even surface for capturing your image. Additionally, consider the ventilation considerations during the drying process to ensure safety and optimal results.
Arrange and Develop Image
To arrange your image for cyanotype development, place your coated and dried paper in a flat, well-lit workspace. Carefully position your objects or negatives to achieve a compelling image composition. Adjust placement for ideal balance, ensuring key elements are centered or intentionally offset. Use the table below to guide your adjustments:
| Step | Focus | Tips |
|---|---|---|
| Image Placement | Composition | Experiment with object positioning to enhance visual interest. |
| Light Exposure | Color balancing | Test different exposure times for depth and tonal range. |
| Alignment | Sharpness and detail | Keep negatives flat against paper to avoid blurring. |
| Final Checks | Overall visual impact | Review for desired contrast and clarity before final exposure. |
Additionally, considering the use of public appearances and endorsements, which can influence the overall appeal of your cyanotype prints, may inspire creative presentation choices. Understanding the history of pinball machines can also inspire thematic elements or nostalgic touches in your artistic projects. Proper lighting conditions are crucial to achieving consistent and vibrant results in cyanotype printing, especially when working in variable indoor or outdoor environments. Being aware of fiber-rich plant-based materials can help in selecting suitable objects for your cyanotype designs, ensuring optimal image quality. Furthermore, experimenting with different composition techniques can enhance the artistic impact of your cyanotypes.
Creative Ways to Use Cyanotype Techniques
Cyanotype techniques open up a world of creative possibilities beyond traditional blueprints. You can incorporate cyanotypes into mixed media artwork, layering them with paint, collage, or drawing to create textured, multidimensional pieces. Experiment with combining cyanotype prints with other photographic or digital media to enhance visual interest. Digital integration allows you to scan and manipulate cyanotypes using editing software, then print or incorporate these edits into larger projects. You might also explore using cyanotypes as backgrounds for mixed media collages or as standalone art pieces with added elements like fabric, paper, or found objects. This versatility encourages you to push boundaries and develop unique, personalized art that blends vintage processes with contemporary techniques. Incorporating Understanding historical photographic processes can inspire innovative approaches and deepen your appreciation of the cyanotype’s unique aesthetic. Additionally, creative exploration can foster a more intuitive and joyful art-making experience. Exploring artistic techniques that combine traditional and modern methods can further expand your creative horizons and lead to unexpected results. Integrating mindfulness practices into your creative process can also foster a deeper connection to cultural heritage and mindfulness during art-making.
Troubleshooting Common Cyanotype Problems

If your cyanotype prints have uneven exposure or areas that look too dark or too light, you might need to adjust your exposure time or check your UV source.
Fading or color loss over time can happen if you don’t store your prints properly or use the right chemicals.
Tackling these common issues will help you achieve consistently vibrant and balanced cyanotypes.
Uneven Exposure Issues
Uneven exposure is a common issue that can ruin your cyanotype prints, leaving them patchy or inconsistent. This often results from uneven light distribution during the exposure process, causing some areas to develop more than others.
To prevent uneven exposure, ensure your UV light source is evenly distributed across the entire print. If your exposure setup is inconsistent, consider using a glass or transparent cover to hold the print flat and promote uniform light exposure.
Chemical staining can also contribute to uneven results, as residual chemicals may cause patchy darkening. Always rinse your print thoroughly after exposure and fix it properly to avoid uneven development.
Proper preparation and a controlled exposure environment help you achieve consistent, vibrant blue cyanotype prints with minimal issues.
Fading and Color Loss
Fading and color loss are common problems that can diminish the vibrancy of your cyanotype prints over time. Lightfastness concerns are at the heart of this issue, as exposure to sunlight and environmental factors can deteriorate the image’s blues and whites.
To guarantee archival preservation, handle your prints with care, avoiding prolonged direct sunlight and high humidity. Store your cyanotypes in dark, cool, and dry conditions, ideally in acid-free sleeves or frames.
Consider applying a protective UV-resistant coating for added longevity. Regularly monitor your prints for signs of fading, and take proactive steps to shield them from damaging light.
The Future of Cyanotype Art and Applications

As technology continues to evolve, the future of cyanotype art and applications looks promising, blending traditional techniques with innovative digital methods. You can expect digital integration to enhance creative possibilities, allowing artists to experiment with new compositions and effects before creating physical prints.
Modern applications extend beyond fine art, including commercial design, educational tools, and even technological innovations like augmented reality overlays. This fusion of digital and analog processes enables more precise control and customization, making cyanotype accessible to a broader audience.
As tools become more user-friendly and affordable, you’ll find opportunities to incorporate cyanotype into various fields, pushing its relevance forward. The future holds a dynamic landscape where classic blueprints meet cutting-edge technology, offering exciting avenues for artistic expression and practical uses.
Frequently Asked Questions
Can Cyanotype Prints Be Preserved Long-Term Without Fading?
Yes, you can preserve cyanotype prints long-term without fading if you focus on chemical stability and fading prevention. Store your prints away from direct sunlight, heat, and humidity, which can accelerate deterioration.
Frame them behind UV-protective glass and handle them with care to avoid damage. Using acid-free materials and proper storage techniques also helps maintain their vibrant blue color, ensuring your cyanotype prints stay beautiful for years to come.
Are There Eco-Friendly Alternatives to Traditional Cyanotype Chemicals?
Yes, you can use plant-based alternatives and environmentally friendly substitutes for traditional cyanotype chemicals. Instead of toxic ferric ammonium citrate and potassium ferricyanide, try using natural extracts like tea or coffee for light-sensitive processes.
You might also explore homemade recipes with plant-based materials that produce similar blue tones. These eco-friendly options reduce environmental impact and make your cyanotype art safer and more sustainable.
How Does Ambient Temperature Affect the Cyanotype Process?
You’ll notice that ambient temperature impacts cyanotype’s temperature sensitivity, affecting the exposure time and final image. Warmer temperatures speed up the process, while cooler ones slow it down.
Humidity effects also come into play, as high humidity can cause uneven prints or longer drying times. To get consistent results, maintain a stable environment with moderate temperature and humidity levels, ensuring your cyanotype process stays predictable and your prints turn out beautifully.
Can Cyanotype Images Be Incorporated Into Digital Artwork?
Yes, you can incorporate cyanotype images into digital artwork for a stunning mixed media piece. Use digital integration by scanning or photographing your cyanotypes, then editing or layering them in graphic software.
This approach allows you to blend traditional cyanotype textures with digital elements, creating unique visual effects. Combining these methods enhances your creativity and results in compelling mixed media art that bridges vintage processes with modern technology.
What Are the Safety Precautions When Handling Cyanotype Chemicals?
When handling cyanotype chemicals, you should always prioritize safety. Wear protective gear like gloves, goggles, and a lab apron to prevent skin and eye contact during chemical handling.
Work in a well-ventilated area to avoid inhaling fumes. Carefully read the safety data sheets, and store chemicals securely away from children and pets.
Taking these precautions helps keep you safe while working with cyanotype chemicals.
Conclusion
Now that you’ve explored the history, process, and creative possibilities of cyanotype printing, you’re ready to try it yourself. With just a few materials and some patience, you can create stunning blue-toned images that stand out. Don’t be afraid to experiment and make mistakes — that’s part of the process. Embrace the unique beauty of cyanotypes and let your creativity shine through this timeless, mesmerizing technique.