To build depth without muddy colors, you should layer transparent glazes over dry, well-prepared surfaces using thin, controlled coats. Focus on using transparent paints and avoid mixing too many hues directly on your palette. Properly applying and drying each layer enhances luminosity without dulling colors. Artists like Vermeer mastered subtle glazing techniques to achieve rich, vibrant effects. If you explore further, you’ll discover how to perfect these methods for stunning, multidimensional portraits or landscapes.
Key Takeaways
- Use transparent, thin glazes layered over dry underpaintings to build depth and luminosity without blending into dull tones.
- Apply multiple, thin layers rather than thick washes to preserve color vibrancy and avoid muddying hues.
- Mix colors carefully on the palette, focusing on hue relationships, and limit direct mixing of multiple pigments to maintain clarity.
- Prepare smooth, properly primed surfaces to ensure transparency and prevent surface texture from muddying the glazed layers.
- Allow each glaze to dry completely before applying the next, enhancing depth and preventing unwanted mixing that causes muddiness.
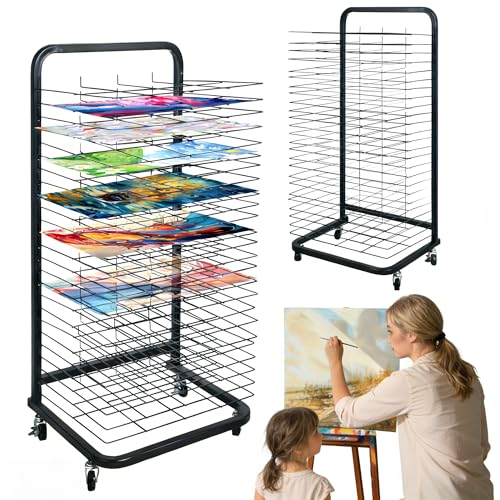
25 Removable Shelves Mobile Art Drying Rack for Classroom, Sturdy Metal Art Canvas Storage & Art Print Display Rack with Locking Wheels (32.22x14.6x17.3 In),Painting Drying Rack,paper drying rack
Efficient & Mobile Art Drying Rack: Effortlessly move and secure this versatile art drying rack with its 4...
As an affiliate, we earn on qualifying purchases.
What Are the Basics of Glazing in Painting?
Glazing in painting involves applying thin, transparent layers of color over a dry base coat to create depth and luminosity. This technique relies on color layering, where each overlay adds subtle shifts in hue and tone. Using innovative techniques can further enhance the vibrancy and realism of your work. Your goal is to utilize pigment transparency, choosing colors that allow light to pass through multiple layers, enhancing vibrancy without muddying the image. You’ll need to be patient, waiting for each layer to dry before adding the next, which builds richness gradually. The key is to use translucent glazes that interact with underlying colors, creating a luminous effect. Additionally, understanding contrast ratio can help artists in balancing light and dark layers to achieve more dynamic depth. By mastering this process, you can achieve a sense of three-dimensionality and subtle color transitions, giving your painting a vibrant, life-like quality rooted in careful manipulation of transparency.

Evellstor Art Storage Rack with Caster Wheels Art Drying Rack Wood Storage Stand for Canvas Storage, Drawing Board Storage Rack, Printed Matter, Paper Pad for Art Studio, Gallery, Artworks
[High Quality Solid Wood]: Art storage rack is made of beech wood and coated with varnish, waterproof and...
As an affiliate, we earn on qualifying purchases.
How Does Translucency Enhance Color Depth?

Translucency in glazing allows light to penetrate through multiple layers of paint, interacting with underlying colors to produce greater depth. This transparency enables you to build subtle color layering, where each glaze adds complexity without obscuring previous layers. Additionally, controlling the opacity of your glazes is essential for achieving the desired luminous effects and depth in your work. As light passes through the translucent layers, it reflects back, creating a luminous effect that enhances visual depth. By carefully controlling the opacity of your glazes, you can create a sense of atmospheric distance or vibrancy in your work. Utilizing the control of translucency helps prevent muddy colors, as the underlying hues remain visible and vibrant. Understanding layering techniques is crucial for mastering this method, allowing for more spontaneous and nuanced color transitions. The result is a rich, multi-dimensional surface that invites viewers to explore the painting’s subtle variations.

Erordna Blueprint Storage Rack Cart - 20 Slots Metal Blueprint Holder with Double-Layer Grids Ensures Secure, Non-Slip Storage, Organizing Posters, Architectural Plans, and Artwork Stably. (20 Slots)
Sturdy Dual-Layer Construction: Our Blueprint Holder features a sturdy metal grid, ensuring secure organization for blueprints and vinyl...
As an affiliate, we earn on qualifying purchases.
What Materials Do You Need for Glazing?

To start glazing, you’ll need the right materials, beginning with transparent paints that create subtle layers. Make sure you have proper mixing tools to blend your glazes smoothly without streaks. Additionally, selecting appropriate painting surfaces that can handle multiple layers without damage or warping is essential for successful glazing. Using quality brushes can also improve the application and blending of your glazes, resulting in a more refined finish. Incorporating layering techniques can help you build depth and luminosity without muddying the colors.
Transparent Paints Selection
Are you wondering which materials you’ll need to create effective transparent glazes? The key is selecting paints with high color transparency, which allows light to pass through layers without muddying the colors. Focus on pigment selection carefully—look for pigments known for their transparency, like certain quinacridones, phthalos, and transparent oxides. Using reliable backup power can serve as a metaphor for choosing dependable materials that ensure your glazing process is successful, just as choosing a reliable power source ensures safety and consistency. Acrylics and oils often offer transparent options, but always check the labels or pigment information. It’s also helpful to understand transparency levels to better judge which paints will work best for your glazing techniques. Avoid opaque or heavily pigmented paints, as they can obscure underlying layers. Using transparent paints ensures your glazes build depth and luminosity without dulling your colors. Keep in mind, the right materials make all the difference in achieving the luminous, layered effects that define successful glazing techniques.
Proper Mixing Tools
Having the right tools on hand is essential for mixing perfect glazing mediums. Your palette selection plays a vital role, so choose a smooth, non-porous surface that allows easy blending without absorbing colors. Using the appropriate mixing tools ensures consistency and prevents unintended color muddiness. A well-organized palette helps you control the consistency and transparency of your glazes. For mixing, use palette knives or flat brushes to blend pigments smoothly, avoiding muddy results. Keep different brushes for mixing and applying to maintain clean colors. Your brush techniques also matter—using soft, rounded brushes helps apply thin, even layers that build depth without disturbing underlying layers. Proper tools guarantee precise control over your glazing process, helping you achieve luminous, layered effects that add depth and vibrancy to your artwork.
Suitable Painting Surfaces
Choosing the right surface is essential for successful glazing, as it directly influences the adhesion, transparency, and overall finish of your layers. A well-prepared surface ensures your glaze layers stay smooth and vibrant. For ideal results, consider different surface textures and materials:
| Surface Material | Preparation Tips | Texture Effect |
|---|---|---|
| Linen Canvas | Sand lightly, apply gesso | Fine, smooth finish |
| Cotton Canvas | Use multiple gesso coats | Slightly textured |
| Wood Panel | Seal with primer, sand smooth | Ultra-smooth, durable |
Proper canvas preparation enhances glaze clarity, and understanding surface textures helps you achieve the desired depth and luminosity in your painting. Additionally, being aware of personal debt forgiveness options can help artists manage their finances more effectively, especially when budgeting for art supplies, freeing up resources for art supplies and studio improvements. Recognizing the importance of surface preparation is vital for artists seeking to maximize glaze effects and maintain color integrity, as it influences the adhesion and longevity of your work.

LEJITEKK Art Storage Rack,Wood Art Drying Storage Stand with Hand&Caster Wheels , Art Canvas Storage for Art Studios,Drawing Board,Printed Matter,Gallery,Artworks
[High Quality Solid Wood]: Made of beech wood and coated with varnish, art storage rack is waterproof and...
As an affiliate, we earn on qualifying purchases.
How Can You Create Effective Glazes Step by Step?
Creating effective glazes begins with preparing a smooth, transparent mixture that enhances your underlying colors. Start by mixing thin layers of transparent paint or glaze medium, focusing on achieving the right consistency. Use transparency techniques to verify each layer adds depth without overwhelming previous colors. Incorporating visual and auditory cues can aid learning, much like how layered glazes build complexity in painting. Apply the glaze with a soft brush or sponge in thin, even coats, allowing each layer to dry completely before adding the next. This step-by-step process of color layering builds richness and luminosity gradually. Controlling transparency is essential to ensure the underlying hues remain visible and vibrant. Keep in mind, the key is controlling the transparency so that the underlying hues remain visible and vibrant. With patience, these layers blend seamlessly, creating depth and complexity without muddying your palette. Practice refining your technique to master the balance between transparency and coverage.
How Do You Avoid Muddy Colors When Glazing?
To keep your glazes vibrant, use transparent glazes instead of opaque ones.
Avoid mixing too many colors at once, which can lead to muddiness. Always work with fresh paint layers to maintain clarity.
Use Transparent Glazes
How can you prevent your transparent glazes from turning muddy? The key is to prioritize layering techniques that maintain color transparency.
When applying glazes, use thin, controlled layers instead of thick washes, which can blend and muddy the colors. Transparent glazes allow underlying hues to show through, creating depth without sacrificing clarity.
Avoid mixing too many colors directly on your palette; instead, build up subtle shifts through successive glazes. This approach helps preserve the vibrancy of each hue and prevents the formation of dull, muddy tones.
Additionally, understanding color mixing principles can help you select and combine hues more effectively, reducing the risk of creating muddy appearances in your glazing techniques.
Limit Color Mixing
Building on the importance of layering transparent glazes, limiting the amount of color mixing on your palette helps keep your hues vibrant and clear. When you restrict mixing, you preserve the integrity of each color, enhancing color harmony and preventing muddiness. Use pre-mixed colors or mix only two hues at a time to maintain control over your palette. This approach ensures that each glaze adds depth through visual layering without muddying the overall composition.
| Tip | Benefit |
|---|---|
| Mix only two colors | Prevents dull, muddy tones |
| Use clean brushes | Keeps colors pure during blending |
| Test colors before application | Ensures harmony and clarity |
Maintain Fresh Paint Layers
Maintaining fresh paint layers is vital for avoiding muddy colors when glazing. When your layers remain wet and properly adhered, you ensure good layer adhesion, which is indispensable for vibrant, transparent glazes. Using local automation techniques can help you manage your painting process more efficiently, ensuring each layer stays at an optimal moisture level. If you let layers dry too much or become dull, subsequent glazes can mix improperly, dulling color saturation and creating muddiness. To keep layers fresh, work quickly but carefully, applying thin, even coats and avoiding overworking the surface. Properly maintained wet layers allow colors to blend seamlessly, preserving clarity and luminosity. Additionally, understanding paint chemistry can help you select the right mediums and drying times to maintain ideal conditions for glazing. Being aware of layer drying times is also essential for timing your glaze application effectively.
Which Masters Perfected the Art of Glazing?
Who truly mastered the delicate craft of glazing in painting? Leonardo da Vinci stands out as a pioneer, perfecting subtle layers that add depth and luminosity to his works. His careful application of transparent glazes allowed him to create realistic skin tones and atmospheric effects. Vetted – Mad Tasting Vermeer, on the other hand, refined glazing techniques to achieve a luminous quality that makes his scenes feel almost alive. He layered thin glazes over dry underpaintings, building depth without sacrificing clarity. Both masters understood that glazing isn’t just about adding color but about controlling light and transparency, a technique that requires meticulous skill. Their mastery transformed painting into a refined craft, elevating color layering into an art form that still influences artists today. Their work exemplifies how mastering glazing can elevate a painting’s realism and vibrancy, demonstrating the importance of layering techniques in achieving depth without muddying colors. Additionally, understanding the composition of light and shadow was crucial for these artists to enhance the three-dimensional effect through glazing.
How Are Modern Artists Using Glazing Today?
How do modern artists incorporate glazing into their techniques today? They use layering techniques that emphasize color transparency, allowing each glaze to subtly alter the underlying hues. This approach creates rich depth and luminous effects, much like traditional methods but with contemporary tools. Additionally, some artists utilize layering techniques that involve careful control of each transparent glaze to build complex visual textures.
Frequently Asked Questions
How Long Should a Glaze Dry Before Applying the Next Layer?
You should wait about 24 hours for a glaze to dry before applying the next layer, but drying time can vary based on layer thickness and environmental conditions.
Thinner layers dry faster, often within a few hours, while thicker ones may need more time.
To guarantee proper adhesion and avoid cracking, check that the glaze feels dry to the touch and is no longer tacky before adding another layer.
Can Glazing Be Used With Acrylic Paints Effectively?
Yes, you can use glazing effectively with acrylic paints. Use layering techniques that leverage acrylics’ transparency, allowing you to build depth and richness without muddying colors.
Thin your acrylics with glazing medium or water, and apply multiple transparent layers, letting each dry before adding the next. This approach enhances luminosity, creating vibrant, luminous effects similar to traditional glazing in oil painting, but with the quick-drying benefits of acrylics.
What Are Common Mistakes Beginners Make in Glazing?
You often make mistakes in glazing by overmixing colors, which can lead to muddy results. Stick to your glazing techniques by applying thin, transparent layers and letting each dry fully.
Avoid rushing the process, as this can cause colors to blend uncontrollably. Focus on building depth gradually through careful color mixing and layering, rather than trying to achieve everything in one step.
Patience and precision will help you master effective glazing.
How Does Glazing Differ Across Various Painting Mediums?
You’ll find that glazing varies across mediums through layering techniques and color transparency.
In oil painting, you often use thin, transparent glazes to build depth gradually, creating luminous effects.
Watercolors rely on transparent washes, allowing underlying layers to shine through.
Acrylics, while less transparent, can mimic glazing with diluted paints and glazing mediums.
Understanding each medium’s properties helps you choose the right layering techniques to achieve vibrant, deep colors without muddiness.
Are There Eco-Friendly or Non-Toxic Glazing Materials Available?
Yes, you can find eco-friendly pigments and non-toxic mediums for glazing. Look for natural or plant-based pigments, which are safer and environmentally friendly.
You might also opt for non-toxic mediums like botanical oils or water-based glazes. These options help you create beautiful, layered effects without harmful chemicals, making your art both sustainable and safe for you and the planet.
Conclusion
Mastering glazing lets you build stunning depth without muddying your colors. By understanding how translucent layers work, choosing the right materials, and applying glazes carefully, you can create luminous, vibrant paintings. Keep practicing and studying the masters’ techniques, and don’t be afraid to experiment with modern methods. With patience and attention, you’ll develop a skill that adds richness and dimension to every piece you create. Happy glazing!